
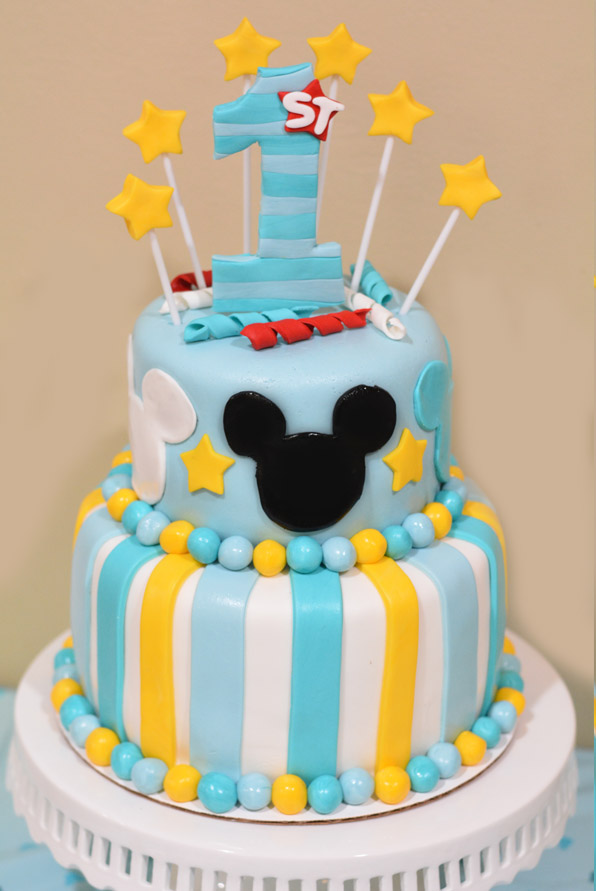
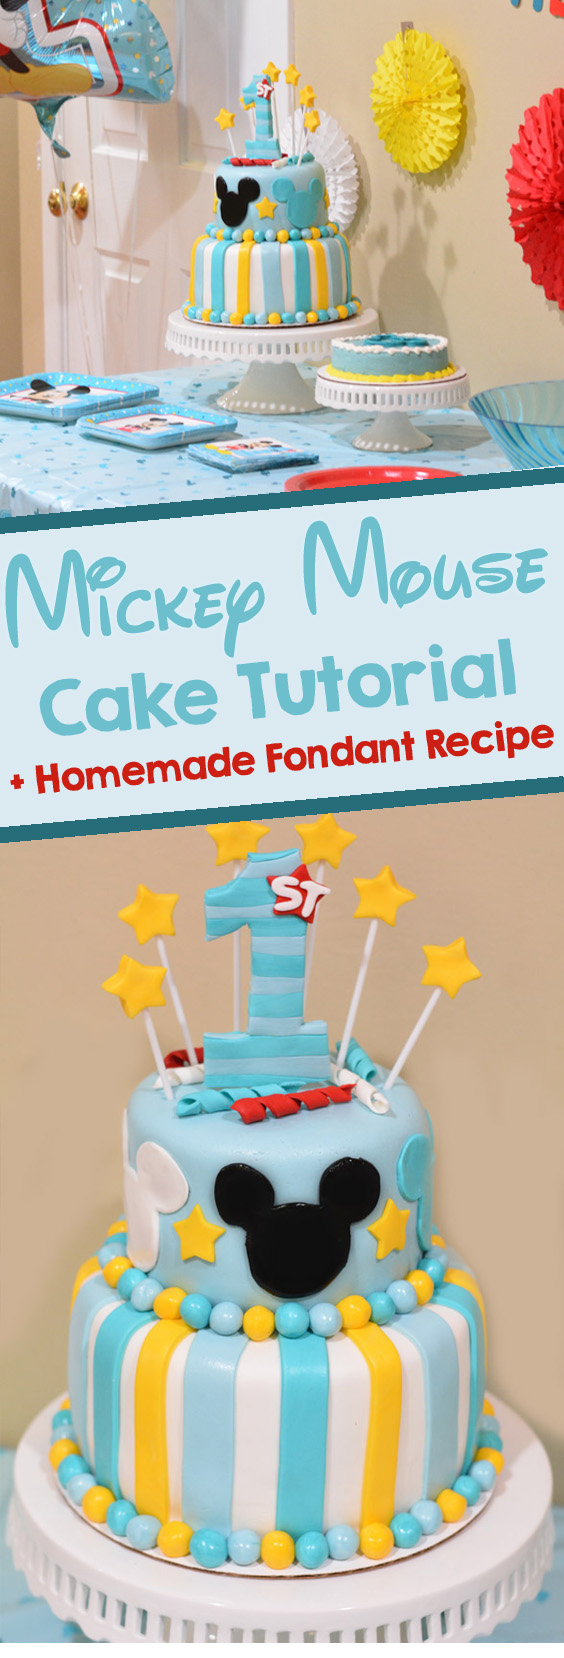
How to Make a Mickey Mouse Cake With Fondant
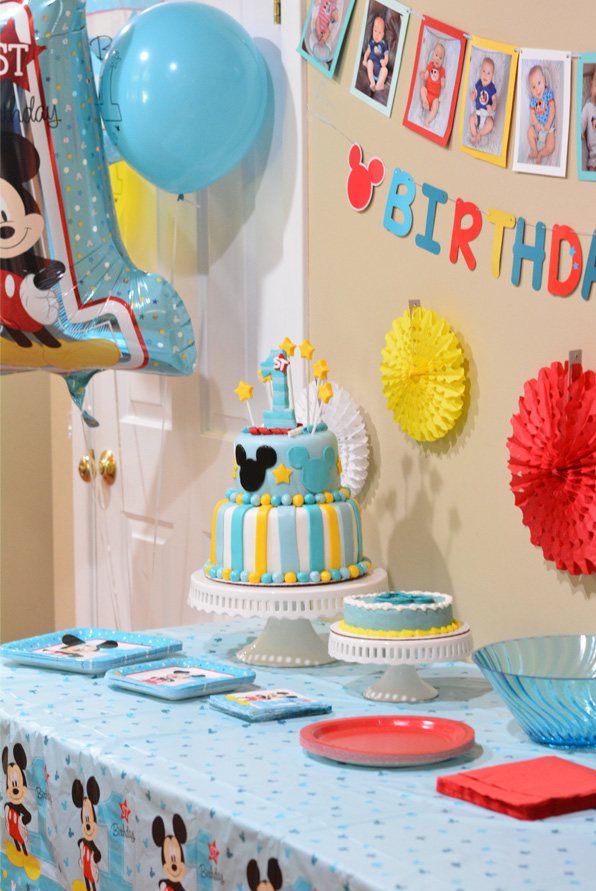
Ohh Toodles! Are you planning a Mickey Mouse birthday party? Learn how to make this Mickey’s 1st Birthday Cake using homemade marshmallow fondant.
Baking has been a passion of mine for many years. I can remember putting on my apron as a kid and getting excited to help my mom in the kitchen making her famous fudge or peanut butter cookies. After I had kids my passion exploded and now more than ever I enjoy spending time in the kitchen having fun with food and making life with kids fun.
This past summer we celebrated my littlest’s first birthday and I LOVE how his Mickey Mouse Cake turned out. We went with the “Mickey’s Fun to Be One” theme and I adjusted the colors to match with the party decor. Over the years I have taught myself how to decorate the cakes, I’ve never taken any classes but will occasionally watch a video for tips. I’ve made each of the boy’s birthday cakes since they turned one and each year it gets easier. I started off years ago decorating with just colored buttercream frosting but have seen branched out to decorated with homemade marshmallow fondant.
How to Make a Mickey Birthday Cake:
What you’ll need:
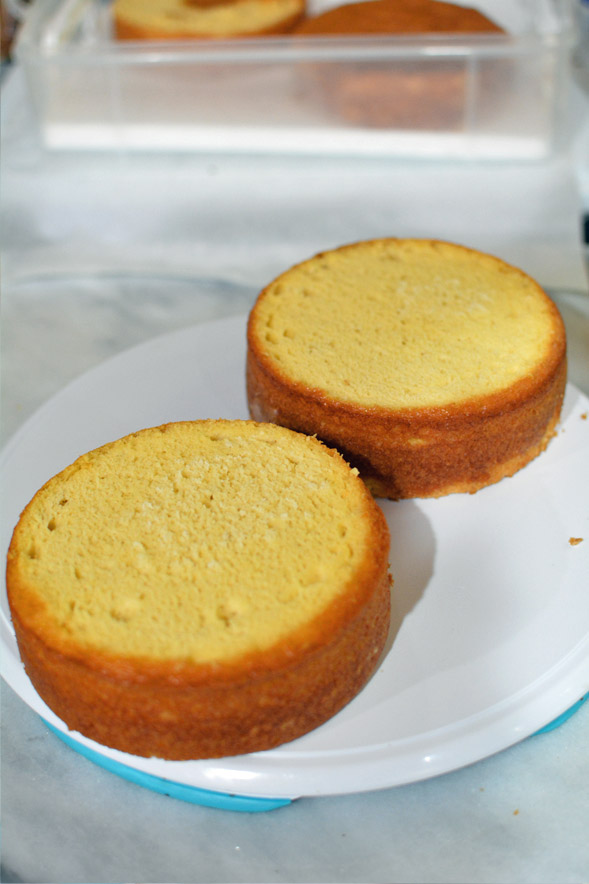
- (2-3) 8 inch cakes
- (2-3) 6 inch cakes
- When stacked together make sure the heights are similar, I made three thinner 8 inch, and 2 thicker 6 in.
- Homemade Marshmallow Fondant – Recipe
- Buttercream – prepared & set aside
- Wilton Color System – Yellow, Brown, Blue, Black, Red
- (A booklet is also included with a color formula chart to help you choose the right color combination.)
- Darker Stripe – Teal “319” (blue & yellow)
- Lighter Stripe- Blue “304” (blue & brown)
- Mickey Mouse cookie cutter
- Small Star Cookie Cutter
- Cardboard cake circles (8 and 6 inch)
- Plastic Dowel Rods – to help support top cake
- 6 Wilton Lollipop sticks
- 1 Wilton Cookie Stick – (thicker & longer for the #1)
- Fondant roller or nonstick roller
Optional:
Once the cakes are baked and cooled, use a knife or cake leveler to level the cakes.

Place a small amount of buttercream frosting in the middle of the cardboard cake circle (it will act like glue).
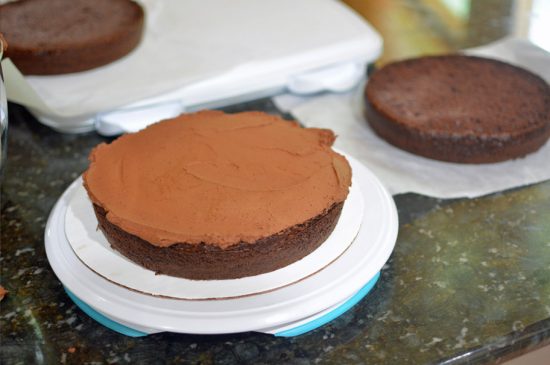
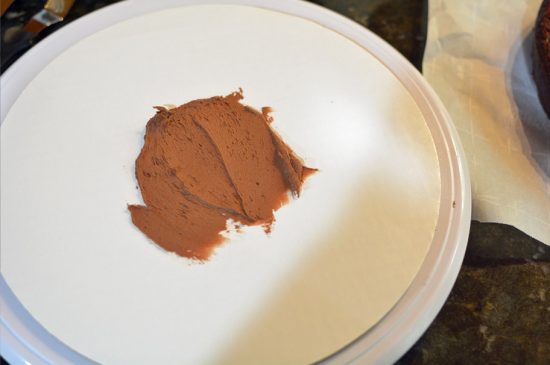
Place the first layer of cake on top of the buttercream and push slightly down. Cover the cake with a layer of buttercream frosting.
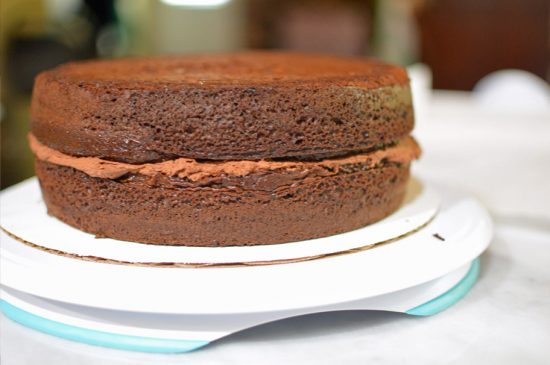
Add the second cake layer and cover with a layer of buttercream frosting.
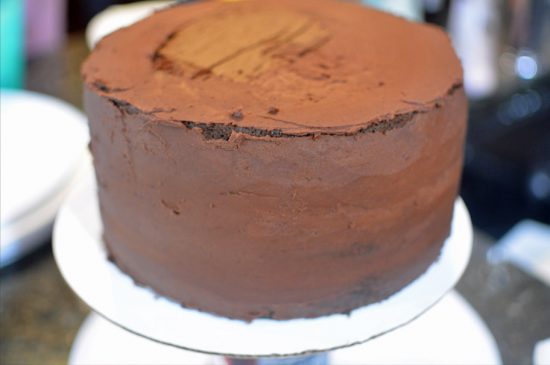
Place the third layer on top and cover the entire cake with a thin layer of buttercream frosting. Try to get all of the surfaces smooth as any bumps may show through the fondant. If you have a cake decorating turn table the process will be easier.
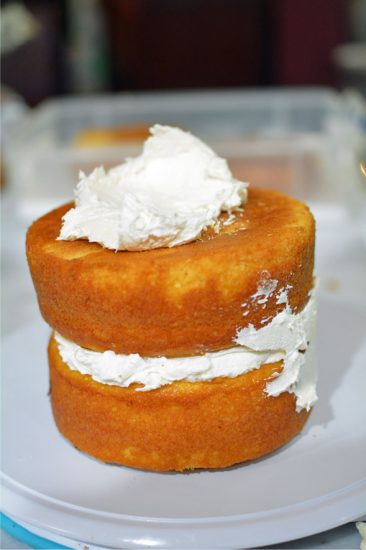
Repeat with the second tier.
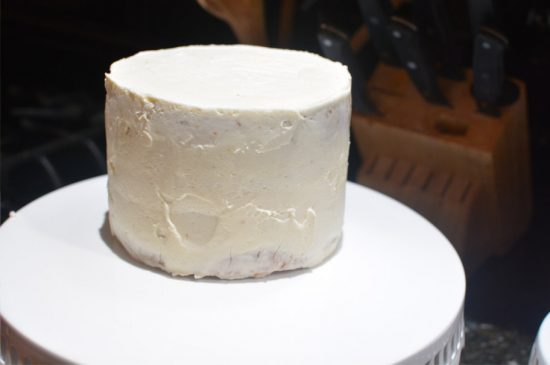
Place the cake in the refrigerator for about 30 minutes to allow the frosting to harden.
Prepare your work area. I recommend using a large nonstick mat. Make sure the surface is clean and smooth, any imperfections will imprint in the fondant.Lightly dust the area with powdered sugar to prevent the fondant from sticking to the work surface.
Knead the fondant to make it softer and easier to work with.
Use your hands to flatten the fondant in the shape of a thick pancake. Use a fondant roller or non-stick roller to flatten the fondant to a circular shape about 1/8 inch thick or a little thicker.
To measure the amount of fondant you will need to cover the cake, you’ll need to measure the height of your cake (x2) plus the width. If your cake is 3 inches high and 8 inches wide you will need at least a 14 in circle of fondant (3+3+8). I try to give myself an extra 2-3 inches.
To help move the fondant onto the cake, loosely roll the fondant onto a rolling pin and than onto your cake.
Smooth the fondant onto the cake and use your hands to remove all wrinkles. Trim off excess fondant using a knife or pizza cutter and smooth the fondant with a fondant smoother.
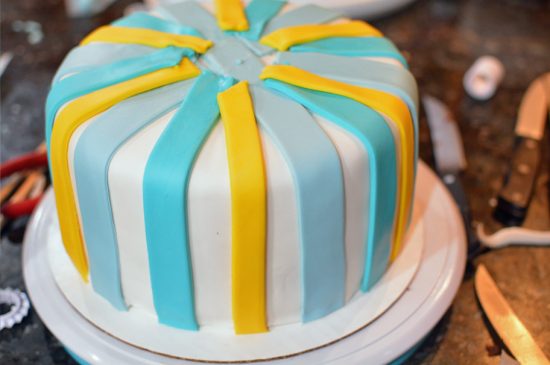
Once you have the base layer of fondant on the cake you can start decorating.
To make the stripes, smooth out the fondant to about 1/8 in in thick and use either a knife or fondant ribbon cutter to cut straight lines. Place them on the cake and cut off the excess.
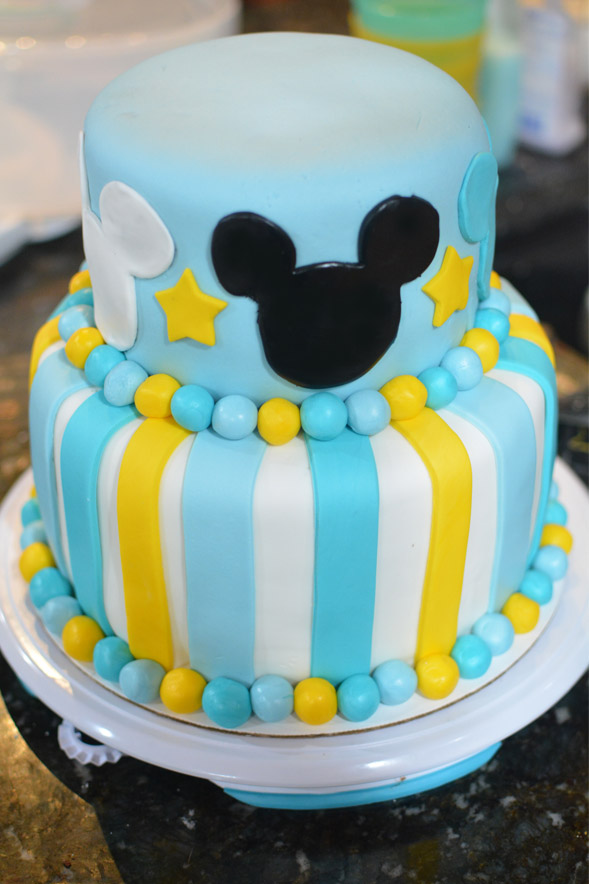
Once you are finished decorating the bottom tier. You’ll want to place 3-4 dowel rods in the center area to prevent the top layer from caving in. You don’t want them all on top of each other, but slightly spread them out.
Once the dowels are cut to height, add the second tier and finish decorating.
Using fondant flattened to 1/8 in thick, cut out the mickey & star shapes and press onto the cake. Make sure to place them evenly as they will stick and may not leave a clean area if removed. You can always measure and mark where you want to place them with a pin hole. To make the balls, roll small pieces of fondant into a ball.
To make the shooting stars, I rolled the yellow fondant to 1/4 in thick. I cut out the star shape using the cookie cutter and stuck a cookie stick into the bottom, allowing it to harden overnight.
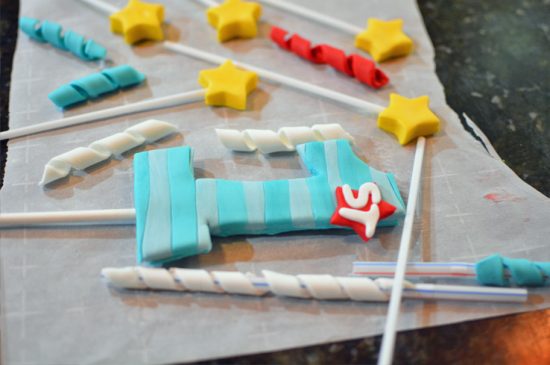
To make the #1 I traced the #1 from the Mickey’s Fun To Be One dessert plate onto parchment paper and cut it out. I rolled strips of the dark teal and light teal and placed them next to each other in an alternating pattern. Using the fondant roller, I flattened the fondant to about 1/8 in thick which combined the colors. Place the #1 parchment stencil on top of the fondant and cut out a number 1 twice. Flip over one #1 and place a cookie stick in the center, place the second #1 on top and slightly press down to secure the cookie stick (makes a sandwich). Allow to harden overnight before you place it in the cake.
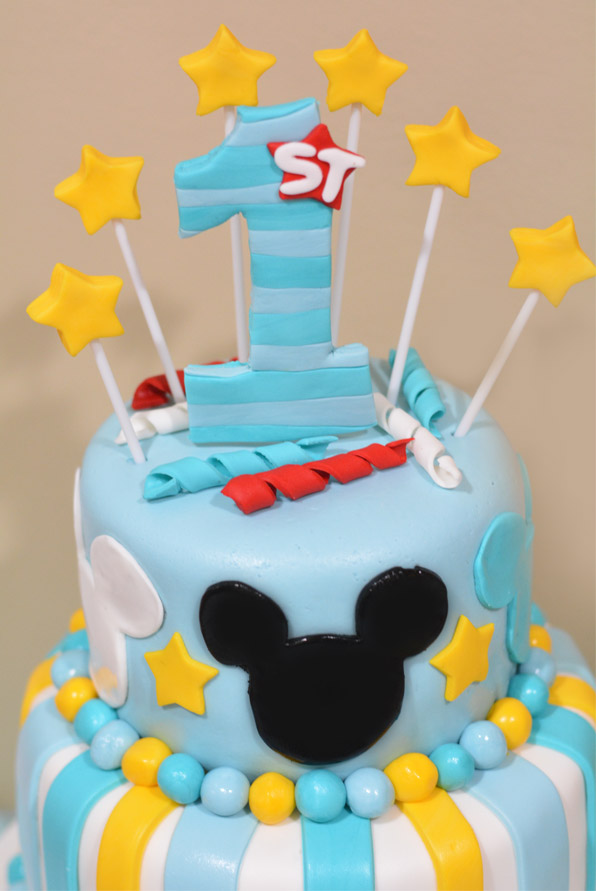
For the streamers, flatten a piece of fondant to 1/8 in thick. Cut a thin piece and wrap around a straw allowing to slightly harden. Carefully expand the width of the streamers to remove from straw.

This is a really lovely cake.
I would love to make this cake for my daughter its so cute. I love how you who the steps in creating this will have to pin it to make in the future thanks.
SO nice! My sister makes a lot of cakes and cupcakes. I think I need to share this with her since so many people at our work asks her to make cakes for showers, birthdays, etc.