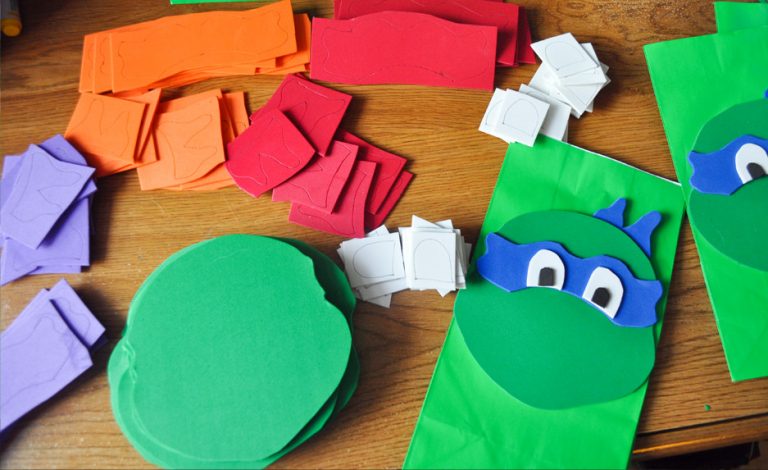
How to Make Ninja Turtle Goodie Bags
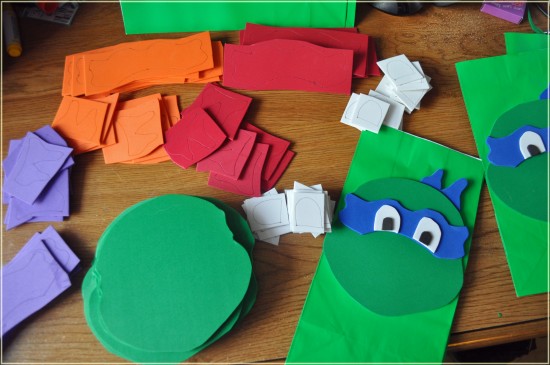
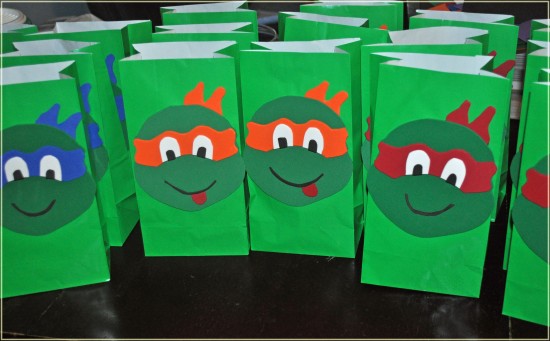
This year the boys decided to combine their birthdays and have one big Teenage Mutant Ninja Turtle bowling party with all of their friends. While I always make their birthday cake this year I decided to make Ninja Turtle goodie bags as well. After deciding on green gift bags we picked up green, red, blue, purple, orange, white & black craft foam sheets from Michael’s Craft Store.
I printed out a template and started tracing and cutting. I spread the work over a couple days so I wasn’t overwhelmed making 20 different goodie bags at once. When I had free time throughout the day I would sit down and cut and trace more until I had twenty heads, face masks, eyes, and mouths. A glue stick worked great to paste the heads together and onto the bag. I let the bags sit overnight to make sure the glue hardened before I started filling them.
How to Make Ninja Turtle Goodie Bags:
Supplies Needed:
- Scissors
- Marker or ball point pen to trace
- Glue stick
- Craft foam sheets
- Teenage Mutant Ninja Turtle face template
- Gift bags
Directions:
- Print out template, I printed a couple different copies, so that I could cut the head out, cut the ribbons out, and cut the eyes out.
- Trace the face, masks, eyes and mouths, onto foam sheets, then cut them out.
- Using a glue stick, attach the mask, eyes, mouth and tongue (optional) to face. Put a little glue on bottom of ribbon and place it on the back of head.
- Attach Ninja Turtle face onto gift bag, let dry.